Using Nanoindenters to Determine Elastic Modulus
Nanoindentation is a ubiquitous analytical technique used to investigate a wide range of material properties. With increasingly compact geometries and high-resolution, nanoindenters can explore the mechanical properties of microscale samples to obtain results that are analogous to the macroscale, bulk material. The cost and convenience benefits of this are self-evident.
Nanoindenters can be leveraged in a choice of materials science test methods and applications. They are also increasingly pivotal in preliminary testing that enables further, more detailed mechanical analyses downstream.
Elastic modulus, for instance, is a key property underlying a range of dynamic behavioral mechanics including fracture toughness which is commonly calculated according to the Dukino and Swain equation. In brief, this considers fracture toughness a function of an applied indentation load, average crack length, the ratio of hardness to elastic modulus, and a geometric constant.
In this blog post, Alemnis will briefly explore how nanoindenters can be used to determine the elastic modulus of materials.
What is Elastic Modulus?
First, let us offer a short definition of elastic modulus. Often referred to as Young’s modulus, after British scientist Thomas Young, the elastic modulus of a material is a measure of its ability to resist bending or compressive forces and is consequently connected to both hardness and stiffness. Elastic moduli are determined as the ratio of tensile stress to strain within the material’s elastic limits for compressive and tensile loads; essentially comprising a measure of the force required to cause reversible (elastic) deformation.
Nanoindenters are used to probe materials and measure malleability/brittleness in relation to linear elasticity on a stress-strain graph. This is critical for gaining a thorough understanding of material performance under pre-defined use conditions and forecasting various dynamic deformation mechanics or modes of failure.
How Do Nanoindenters Determine Elastic Modulus?
To measure the elastic moduli of materials, nanoindenters bring a probe tip into contact with the surface at minuscule loads, typically just a few micronewtons (µN). This load is ramped up at user-defined rates to a maximum point and then decreased back down to zero at the same rate. Conventional indentation tests acquire load-displacement curves that are indicative of various mechanical properties. By observing the unloading curve, analysts can observe the elastic recovery of sample materials, which is a fundamental parameter in calculating elastic modulus.
Alemnis Nanoindenters
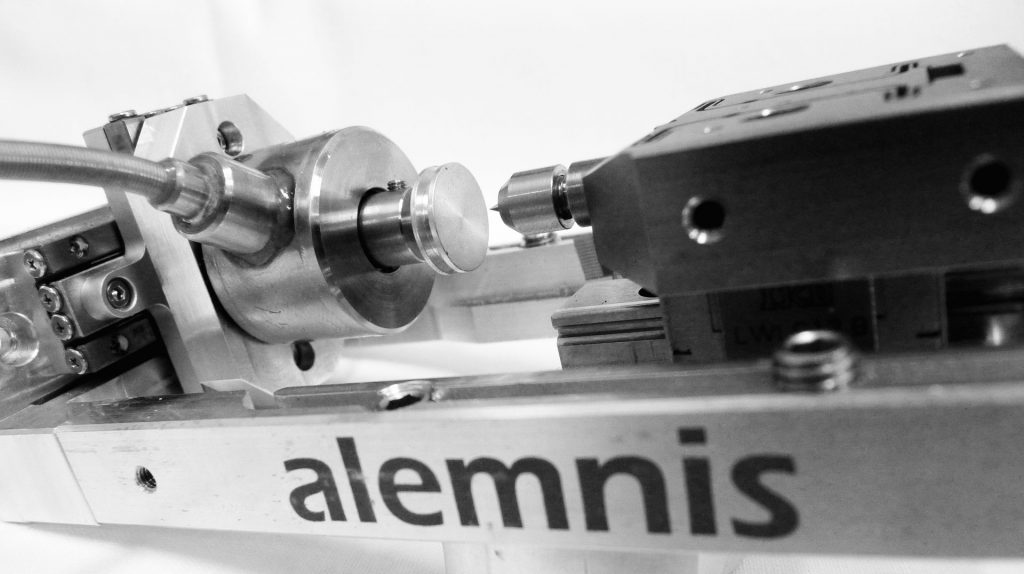
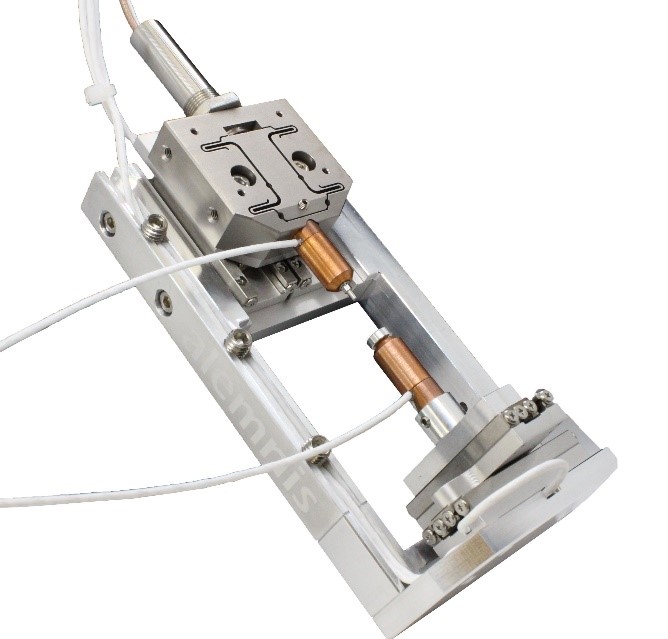
At Alemnis, we have developed a class-leading nanoindentation unit that pushes the frontiers of nanomechanical testing. The Alemnis Standard Assembly (ASA) exceeds traditional nanoindenters in terms of measurement accuracy and experiment flexibility. If you would like more information about measuring the elastic moduli of your materials with our innovative nanoindenter, simply contact a member of the team today.
Ultra-High Strain Rate Testing of Materials
The high strain rate behavior of materials is of enormous interest to product developers and the wider research community. Strain rate testing intersects an extremely wide range of market segments and is relevant to a variety of application areas, providing unique insights into how ceramics, electronics arrays, polymers, and so on, can withstand severe loading events.
At the macroscale, there are numerous proven methodologies for ultra-high strain rate testing (impact experiments, Kolsky pressure bar, etc.). However, the micro- and nanoscales remain comparatively unexplored due to the inherent limitations of the established testing methods. One of the foremost techniques used to explore the mechanical properties of sample materials is nanoindentation. Though incredibly valuable, nanoindentation tests typically employ quasi-static loading, which limits available strain rates to fairly low levels (<10-2s-1).
How to Achieve Ultra-High Strain Rates via Nanoindentation
The problem with high strain rate testing of materials via nanoindentation is that conventional micromechanical indenters with strain gage sensors, or load cells, have low resonant frequencies and poor sampling rates. This has the tandem effect of increased signal noise and low resolution due to slow feedback loops. Resolving load-displacement data at strain rates above 10-2s-1 requires a high data acquisition rate and extremely precise actuation frequencies. Only piezoelectric actuation and sensing offer that level of control for micromechanical testing.
Additionally, ultra-high strain rate testing via nanoindentation is facilitated by novel test methods like micropillar compression. Using a piezo-based nanoindenter and a microscale pillar of lithographically-generated or extracted sample material, it is possible to achieve strain rates up to 10,000 s-1. Owing to the sample’s extremely small dimensions relative to various test parameters (actuation velocity, inertia, wave travel time, etc.), fatigue, impact, and dynamic deformation phenomena can be acquired at ultra-high strain rates without interference.
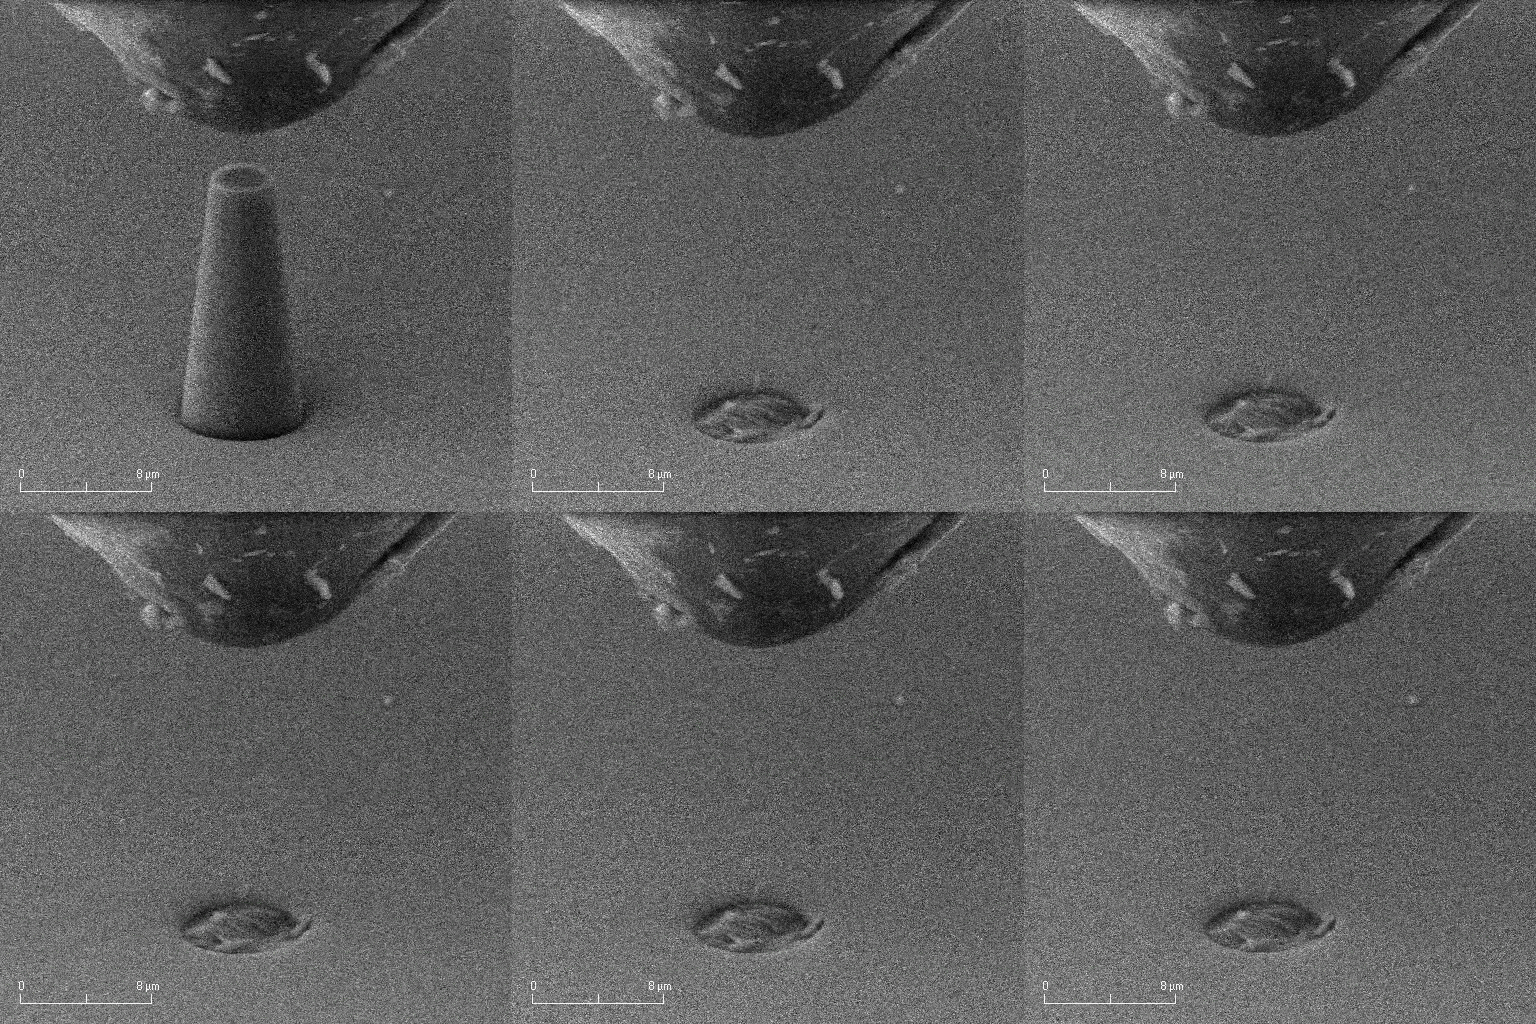
Currently, fused silica micropillars exist as a proof of concept for how ultra-high strain rate testing can be carried out for numerous other materials with unexplored high-strain rate properties.
Read our full, in-depth article on Ultra-High Strain Rate Testing with a case study on fused silica micropillar compression for more details.
Ultra-High Strain Rate Testing with Alemnis
Alemnis specializes in micro- and nanoscale indentation testing for a wide range of materials, leveraging our pioneering Alemnis Standard Assembly (ASA) with proprietary high- and ultra-high strain rate modules. For strain rates of 1,000 s-1 and above
Alemnis offers four distinct configurations:
- VHS-1-1, for impact/fatigue testing at strain rates of up to 1,000 s-1 using a piezo stack actuator with a normal load range of 1N.
- UHS-1-1, for impact/fatigue testing at ultra-high strain rates of >1,000 s-1 using class-leading SmarTip actuation with a range of +/- 175V.
- UHS-1-3, for ultra-high strain rate tests with additional tri-axial sensing (normal and lateral force) with a lateral load range of +/- 0.1N.
- UHS-3-3, a complete ultra-high strain rate testing solution with tri-axial sensing and actuation enabling novel nanotribology applications.
If you would like more information about integrating the Alemnis ASA for your high strain rate testing objectives, simply contact a member of the sales team today.
In-Situ Mechanical Testing for Real-Time Materials Characterization
Observing how materials respond to applied stress in their native state is fundamental to understanding their mechanical properties (creep deformation, fracture toughness, hardness, elastic modulus, etc.). Limited insights can be gained from structural and surface analysis of samples before and after a mechanical load has been applied, typically via indentation. However, this fails to yield accurate data regarding the real-time deformation behavior of samples under test.
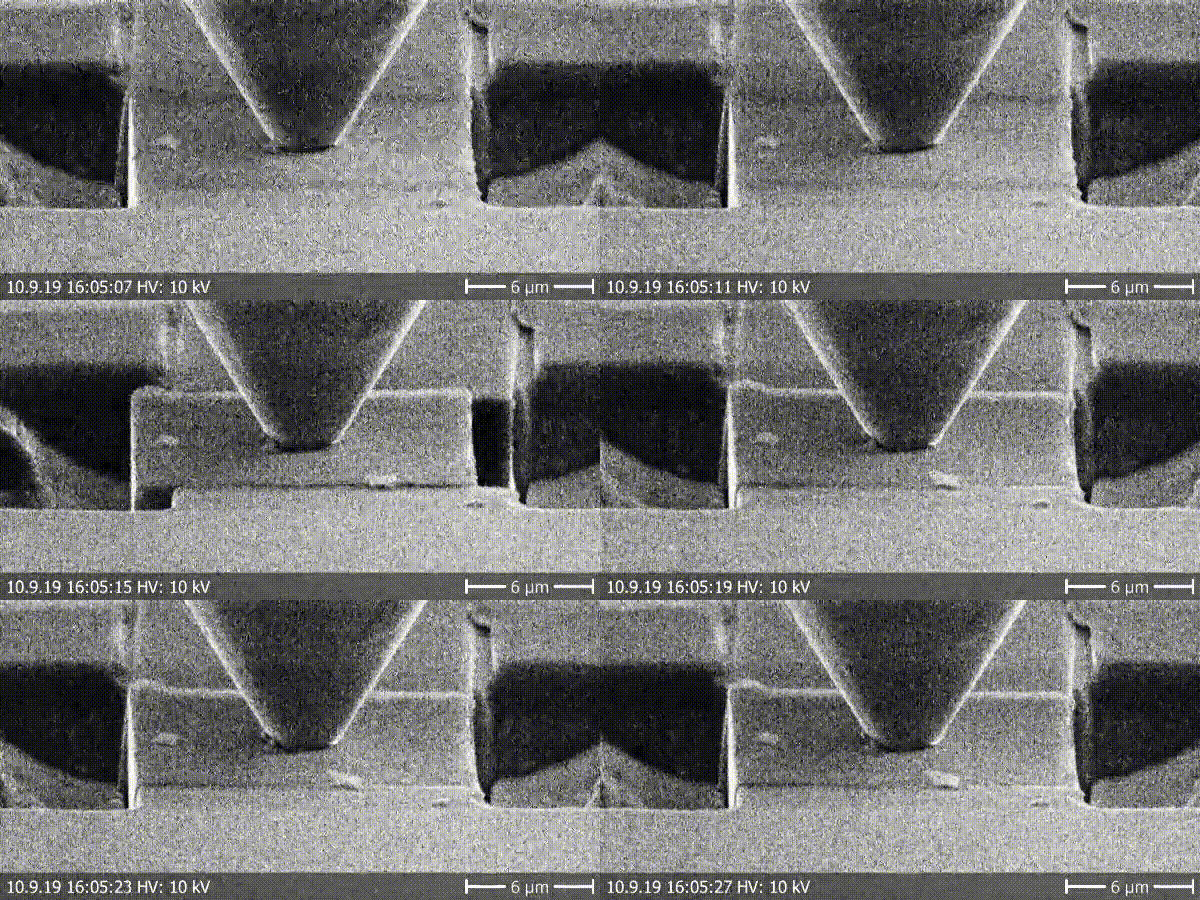
In situ mechanical testing is the only way to observe the real-time mechanical performance of samples under applied loads. For instance, conducting nanoindentation in a scanning electron microscope (SEM) environment allows researchers to visualize key parameters of their mechanical tests, including the actual deformation mechanics of samples in real-time.
Read More: What Properties Can Be Measured By Nanoindentation?
In this article, Alemnis briefly explores how real-time materials characterization can be actualized using vacuum-compatible nanoindenters and complementary SEM-based imaging.
In Situ Mechanical Testing: Challenges & Solutions
Indentation is a common mechanical testing method used to explore the physical properties of different sample types (alloys, ceramics, polymers, etc.). The basic principle involves the application of a mechanical load via a diamond probe tip to determine a sample’s resistance to deformation. Typically carried out ex-situ, various indentation methods have been used to investigate the elastic moduli and hardness scales of materials as a function of load-depth curves. However, conventional indentation is unsuitable for in situ mechanical testing.
Because surface observations are made after the fact, all conclusions drawn from load-depth data that pertain to specific deformation mechanics within the material are largely speculative. This complication is compounded by the rise of nanomechanical testing based on sub-micro scale (μm) indentation. In situ mechanical testing subsequently requires a powerful imaging tool that can offer nanoscale observations of sample mechanics in real-time.

With far superior spatial resolution than optical light-based microscopy, SEMs have significantly shifted the goalposts of modern materials characterization. Prior to the onset of SEM, researchers were limited to nominal magnification ranges of up to 1000x due to the limited resolving power of visible light. A focused electron beam offers magnifying capabilities of up to 50,000x which yields extremely high lateral resolution ranging down to just a few nanometres (nm). Yet the limited geometries and vacuum pressures of sample chambers make it impossible to couple SEM imagery with conventional nanoindenters.
Small-scale, vacuum compatible nanoindentation modules are subsequently a prerequisite for in situ mechanical testing. This can yield a range of valuable results, providing accurate data regarding crack propagation, delamination, fracture onset, and more.
Real-Time Materials Characterization with Alemnis
Alemnis offers a unique solution for in situ mechanical testing of myriad sample types with real-time imaging via SEM. The Alemnis Standard Assembly (ASA) is a small footprint nanoindenter comprising a piezo actuated displacement head with an integrated sensor for completely closed-loop indentation testing. This module can be mounted and operated within the sample chamber of an SEM with sufficient space, enabling researchers to observe the real-time displacement of their samples down to a single nanometre.
If you would like to learn more about the unique Almenis solution for nanoindentation testing, read our previous blog post: What is a Nanoindenter?
We also provide custom mounting solutions and modifications for SEM integration. Contact a member of the Alemnis team today to learn about costing an ASA configuration with your SEM unit.
Introduction to Tribology

Tribology is defined as the science and technology of interacting surfaces in relative motion. It therefore encompasses the study of friction, wear and lubrication between surfaces in contact and the interactions at their interface. Such interactions may be the transmission of forces, the conversion of mechanical energy, the chemistry of the surfaces, or the interlocking phenomena related to surface morphology and topography. The basic essence of tribology is to understand these surface interactions and thus be able to solve problems and find adequate solutions.
The economic implications of tribology are significant with recent research showing that several percent of the Gross National Product (GNP) could be saved in many industrialized nations by solving tribological problems. This could be as simple a solution as the application of a low friction coating to a surface, the amelioration of the lubricant at the sliding interface, or the reduction in wear by changing the system design.
Tribology is a truly interdisciplinary science and must therefore by treated as one. Many engineers are unprepared for solving tribological problems because they only see one side of the problem. For example, a mechanical engineer may understand the mechanics of a contact, but not the potential chemical interactions that may occur, nor the potential for lowering friction by the addition of a lubricant. Also, most undergraduate engineering courses often neglect tribology, or only cover the subject very briefly. This does not help graduates to gain the tools necessary to solve real-world tribological problems.
This course begins with the basics of surface topography and contact mechanics, as well as fundamental concepts of deformation at different scales. This is followed by a focus on the different modes of friction and wear that may be encountered, with emphasis on adhesive and abrasive/erosive wear, ceramics wear, polymer wear and coatings wear. Two sessions are dedicated to the design of tribological tests, the instrument configurations currently available and the best ways to interpret test data.
At the end of this course, the attendee will have a solid understanding of basic tribology principles, test methods and will have gained a valuable starting point for solving real-world tribological problems.
This course is intended for engineers who have encountered practical friction and wear problems and want to learn how to solve them. It is equally intended for active researchers in surface science, coatings research, materials testing and product development.
Run annually at Danish Technological Institute, Kongsvang Allé 29, DK-8000 Aarhus C, Denmark: https://atv-semapp.dk/introduction-to-tribology/

Introduction à la tribologie

NOTE: this course is given in FRENCH
La tribologie est la science et la technologie qui traite de l’interaction de surfaces quand elles se trouvent en mouvement relatif. Cette discipline comporte ainsi l’étude des frottements, de l’usure et de la lubrification de surfaces en contact, ainsi que celle de leurs interactions à leur interface. Ces interactions peuvent être une transmission de forces, la conversion d’une énergie mécanique, les propriétés chimiques des surfaces en question, ou les phénomènes enclenchés par leur morphologie et leur topographie. L’essence même de la tribologie est donc de comprendre ces interactions en vue de résoudre les problèmes qui en découlent, et de trouver des solutions adéquates.
Les implications économiques de la tribologie sont significatives quand on considère, selon des recherches récentes, que plusieurs pour cent du Produit National Brut (PNB) de nombreux pays industrialisés pourraient être sauvés, si l’on apportait des solutions aux problèmes tribologiques. Ce pourrait être aussi simple que l’application d’un revêtement à faible coefficient de frottement sur une surface, l’amélioration du lubrifiant dans une interface coulissante, ou la réduction d’usure en modifiant le design du système.
La tribologie est vraiment une science interdisciplinaire et doit, par conséquent, être considérée sous un angle holistique. Les ingénieurs sont souvent mal préparés à résoudre les problèmes de cette branche car ils n’en voient qu’un aspect : un ingénieur en mécanique pourrait certainement comprendre les subtilités mécaniques de surfaces en contact, mais pas les interactions chimiques possibles, ou le potentiel d’une diminution de frottement grâce à un lubrifiant. De même, la plupart des cours d’ingénierie de premier cycle négligent l’étude de la tribologie – ou ne couvrent le sujet que très brièvement. Cette situation ne donne pas aux diplômés d’aujourd’hui les outils nécessaires pour résoudre les problèmes tribologiques du monde réel.
Le cours débute avec les bases de topographie de surface, les principes de la mécanique de contact, ainsi que les concepts fondamentaux de déformation à différentes échelles. Le cours se concentre ensuite sur les différents modes de frottements et d’usure, en mettant l’accent sur l’usure par adhésion et abrasion/érosion, l’usure des céramiques, des polymères et des couches de recouvrement. Deux sessions sont consacrées à des modèles de tests tribologiques, aux configurations instrumentales actuellement disponibles, et aux meilleurs moyens d’interpréter les données de tests.
A la fin du cours, le participant aura une bonne compréhension des principes de base tribologiques, des méthodes de tests, et aura atteint un précieux point de départ pour appréhender les problèmes tribologiques de ce monde.
Ce cours est destiné aux ingénieurs qui ont rencontré des problèmes pratiques de frottement et d’usure, et qui désirent apprendre comment les résoudre. Il s’adresse également aux chercheurs actifs dans la science des surfaces, dans la recherche des revêtements (films), dans les essais sur les matériaux, ou dans le développement de produits.
Run annually by FSRM (Swiss Federation for Research in Microtechnology): (https://www.fsrm.ch/doc/c638.php)
Nanoindentation Course
Practical indentation testing of materials to measure their mechanical properties has been in common use for over 100 years. Over that time there have been many developments, the most recent being the use of Instrumented Indentation, where load and depth are simultaneously monitored during indentation in order to exploit the resultant curve and calculate mechanical properties. Instrumented indentation has superseded many conventional indentation techniques (Vickers, Rockwell, Knoop, etc.) owing to its ease of use and better accuracy at low depths where conventional techniques would be either impossible to use or would produce large inaccuracies.
Many current engineers and researchers were schooled in the art of conventional indentation testing and perhaps lack the knowledge and experience required for instrumented indentation. In many current industrial applications, e.g., the automotive industry, an engineer is faced with measuring the mechanical properties of a 3 µm thick diamond-like carbon (DLC) coating on a steel component but he/she only learnt about Rockwell indentation at college, a method which is completely unsuited for such an application.
The traditionally trained engineer tends to treat mechanical properties as a “textbook value” where he/she assumes that the property, e.g., hardness, is the same throughout the material. This course sets out to shatter this myth and show by practical experimentation that most surface mechanical properties can vary greatly, especially close to the surface where they may have been influenced by machining, heat treatment, chemical exposure, or oxidation.
This course is therefore focused on providing the “bridge” from conventional techniques to the current state-of-the-art. It is designed to introduce instrumented indentation as a logical extension to traditional techniques and it combines theory with practical experimentation.
The course will include both theoretical and practical instruction from two leading experts from academia and an instrument manufacturer (Alemnis). Understanding of the underlying principles and practical measurement issues will be presented.
The two and half day schedule includes a minimum of two and a half hours of practical hands-on training using two commercially available nanoindenters where the attendees are split into two groups of 6 and a range of experiments are designed and executed with group input encouraged.
Run in various locations annually: www.nanoindentationcourse.com
Specifically at EPFL annually in Sept: http://edu.epfl.ch/coursebook/en/ccmx-advanced-course-instrumented-nanoindentation-MSE-656

The Cambridge Tribology Course: Friction, Wear & Lubrication

Intensive three-day programme offering an excellent opportunity to gain an overview of the field of tribology.
This highly successful course provides an insight into the principles which underlie this important topic. The course is run by the University of Cambridge Department of Engineering, a worldwide centre of excellence in the field. Tribology – the science and technology of friction, wear and lubrication – makes a vital contribution to almost every area of industrial activity and yet is often under-represented in the education of scientists and engineers.
The course consists of an intensive three-day programme delivered by leading experts. It offers an excellent opportunity to gain an overview of the field of tribology. Lectures, combined with informal discussion periods and a workshop session, will cover the key elements of the subject and will be complemented by case studies drawn from current industrial practice.
-
- Provides a comprehensive and cost effective overview of this vitally important area
-
- Introduces the theory and practice of friction, wear and lubrication in an industrial context
-
- Combines lectures and informal discussion periods with practice in problem solving
-
- Gives valuable, informal access to leading experts
-
- Enables networking with professionals from other sectors to share ideas and practice
- Provides a comprehensive volume of course notes and supporting material in electronic form for all participants
Run annually at University of Cambridge in Sept: https://www.ifm.eng.cam.ac.uk/ifmecs/ifm-ecs-courses/tribology/

Tribology: Friction, Wear and Lubrication

The study of friction, wear, and lubrication is of enormous practical importance, because the function of many mechanical, electromechanical, and biological systems depends on the appropriate friction and wear values. In recent decades, this field, termed tribology, has received increasing attention as it has become evident that the wastage of resources resulting from high friction and wear is greater than 6% of the Gross National Product. The potential savings offered by improved tribological knowledge are immense.
However, most engineers do not have a sufficient background in this area. For example, an undergraduate engineering student receives perhaps an hour of instruction in tribology. Moreover, most reference works of tribology provide little guidance to solving real-world problems.
This program presents current insights into tribology, focusing on such fundamental concepts as surface energy, elastic and elastoplastic deformation, micro-fracture, and surface interactions at the micro- and nano-scale. Special consideration is given to the application of fundamental knowledge to control friction and wear behavior through lubrication and the selection of materials and coatings in practical situations. Furthermore, modern experimental methods are discussed and several case studies are used to illustrate how fundamental tribology knowledge can be applied in the design of tribological components and systems.
Run annually in June by MIT (Massachusetts Institute of Technology) and commonly known as the “MIT Tribology Course”
http://web.mit.edu/professional/short-programs/courses/designing_tribological_systems.html

Reliability and Test of Microsystems

This course has been developed to give attendees the background to perform Microsystem reliability characterization from the component to system levels. Initially, we present the fundamentals of mechanical, environmental, and reliability testing as applied to Microsystems. The focus begins with the characterization of single components and structures; these are illustrated with practical examples from industry. We apply these procedures to MEMS and Microsystem level reliability test applications. Test techniques, specifications, and methodology are presented in detail with examples from industry. Additionally, for courses taking place in Neuchatel, participants will see live demonstrations of typical testing techniques to enable them to apply these concepts to their own application area.
This course is designed for the practicing scientist or engineer to provide a foundation in surface mechanical properties characterisation and reliability testing of Microsystems and Micro-Electro Mechanical Systems (MEMS).
Run annually by FSRM (Swiss Federation for Research in Microtechnology): http://www.fsrm.ch/doc/c141.asp
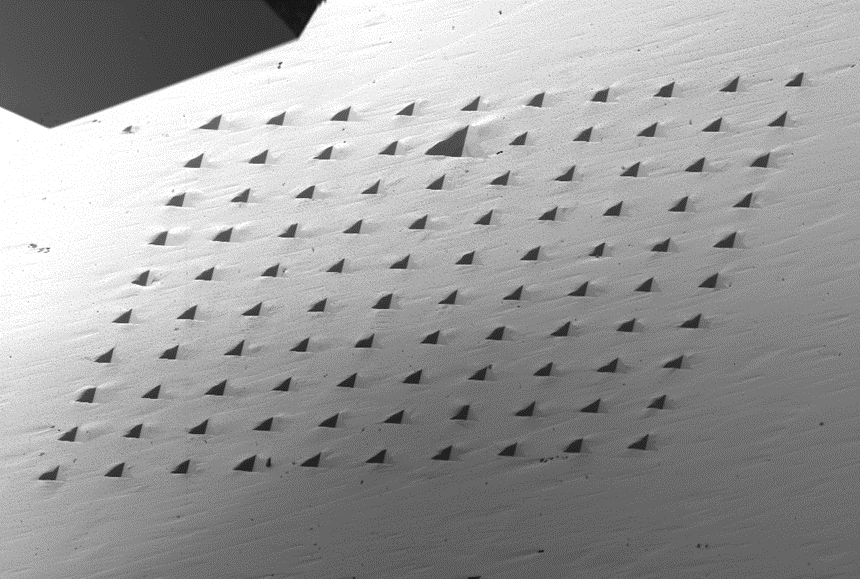
Ultra high speed mapping capability
Alemnis introduces ultra high speed mapping capability. This technique is revolutionizing the manner in which surface constituent properties can be characterized by nanoindentation.
A combination of the Enhanced Controller (ECO) with the Ultra High Strain Rate (UHSR) module has enabled mapping to be performed at very high speeds with unparalleled resolution.
To understand the basics of 2D nanoindentation mapping, see the following papers:
N. X. Randall, M. Vandamme and F-J Ulm, Nanoindentation analysis as a two-dimensional tool for mapping the mechanical properties of complex surfaces, J. Mater. Res. , Vol. 24, No. 3 (March 2009) 679-690
https://doi.org/10.1557/jmr.2009.0149
O. K. Mahabadi, N. X. Randall, Z. Zong and G, Grasselli, A novel approach for micro-scale characterization and modelling of geomaterials incorporating actual material heterogeneity, Geophysical Research Letters, Vol. 39, Issue 1 (2012) L01303, doi:10.1029/2011GL050411
https://doi.org/10.1029/2011GL050411
L. Sorelli, D. Vallee, A. R. Alizadeh, J. Beaudoin and N. X. Randall, Disclosing the mechanical properties of green Calcium-Silicate-Hydrates by statistical nanoindentation techniques, Advanced Materials Research, 409 (2012) 544-549


