TRIBOLOGY
Tribology testing with the Alemnis Standard Assembly (ASA) is possible in several different configurations, depending on the application. For example, the scratch testing option can be used to apply a constant or progressive applied load and then perform a tribology test with synchronized measurement of the tangential force. The friction coefficient is then recalculated from the ratio of the tangential force to the applied load. Such linear tribology tests can be performed either as a single pass, or as a multipass test. Another way to perform tribology tests is to use the Ultra High Strain Rate (UHS) option and use the lateral measurement axis of the SmarTip to measure the tangential force during the test. This opens up a whole new range of possibilities as the friction coefficient can then be measured in two perpendicular axes (with UHS-1-3 and UHS-3-3 options) and with a wide range of frequencies.
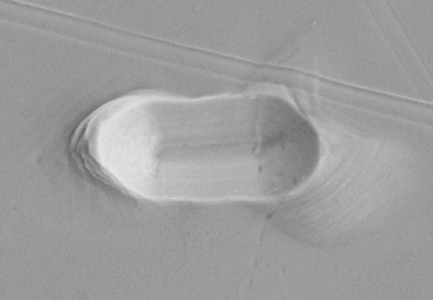
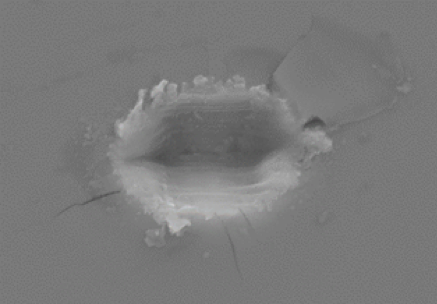
Examples of high frequency cyclic lateral oscillation tests on copper (left) and silicon (right) with a conical diamond indenter and lateral frequency 500 Hz applied over 2 ms
The example shown gives an idea of typical tribological wear scars seen in the SEM after tests made on copper and silicon with a lateral oscillation frequency of 500 Hz. Such tests are commonly used to evaluate the resistance of materials to fretting failure (fretting wear being defined as the surface damage which occurs between two contacting surfaces experiencing cyclic motion with very small amplitudes).
Another application of the Smartip is to actuate the indenter laterally and collect the lateral force signal in two directions.
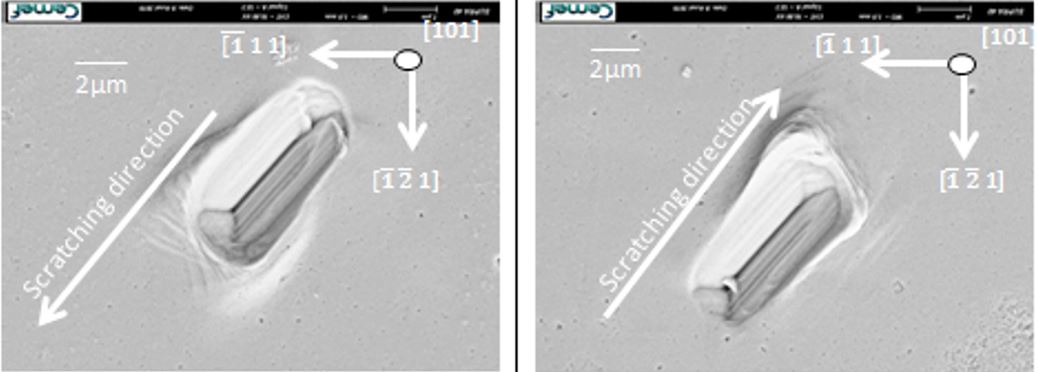
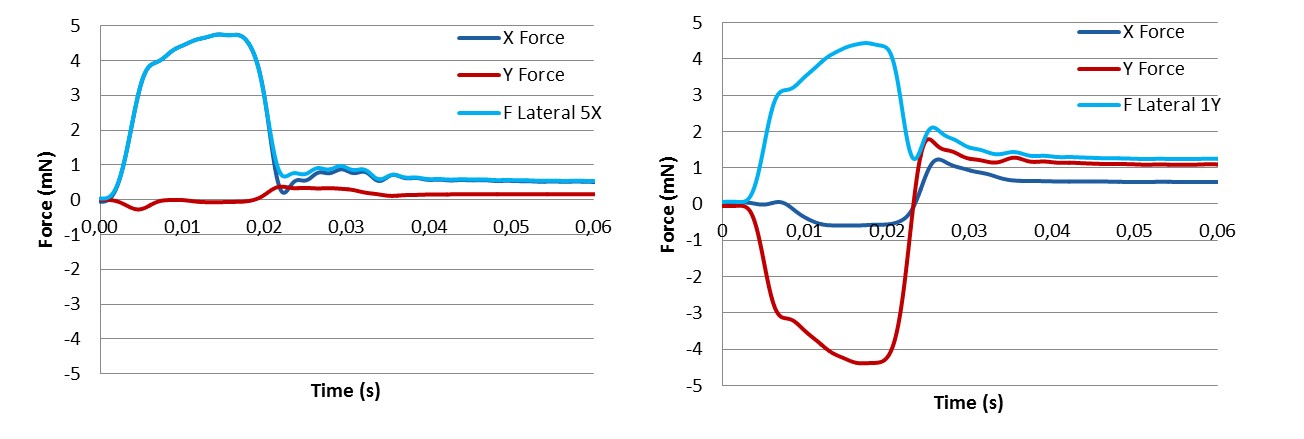
Example of longitudinal scratch in two directions applied at 30 Hz frequency and 80V amplitude for a duration of 33ms in a bulk copper sample. Measured lateral (frictional) force signal shown in light blue.
The ASA has also been used for tribology testing in conjunction with the Scratch testing Stage (STS). One interesting example is for a Silicon Carbide (SiC) fibre embedded in a SiC matrix with a pyrolytic carbon interphase, such fibre-matrix composites being of interest for nuclear fission/fusion reactor components where toughening mechanisms need to be better understood.
An area of interest is chosen along a fibre, after which it is exposed by Focused Ion Beam (FIB) milling and then isolated to provide a fixed length section which can be tested. An additional hole is created in the fibre in order to provide a grip for the indenter.

Example of sample preparation for a single SiC fibre in a SiC matrix with a pyrolytic carbon interphase. A section of the fibre is exposed by FIB polishing (left) and then isolated by FIB milling on either side (right) to provide a fixed length section (Courtesy of Dept of Nuclear Engineering, University of California, Berkeley, USA)
A fibre pull-out test can then be performed by approaching the indenter until it locks into the central hole, a fixed normal load is applied and then the lateral force is increased until the fibre debonds. The measured lateral force signal is then used to calculate the failure stress and the load drop associated with the failure can be clearly captured.
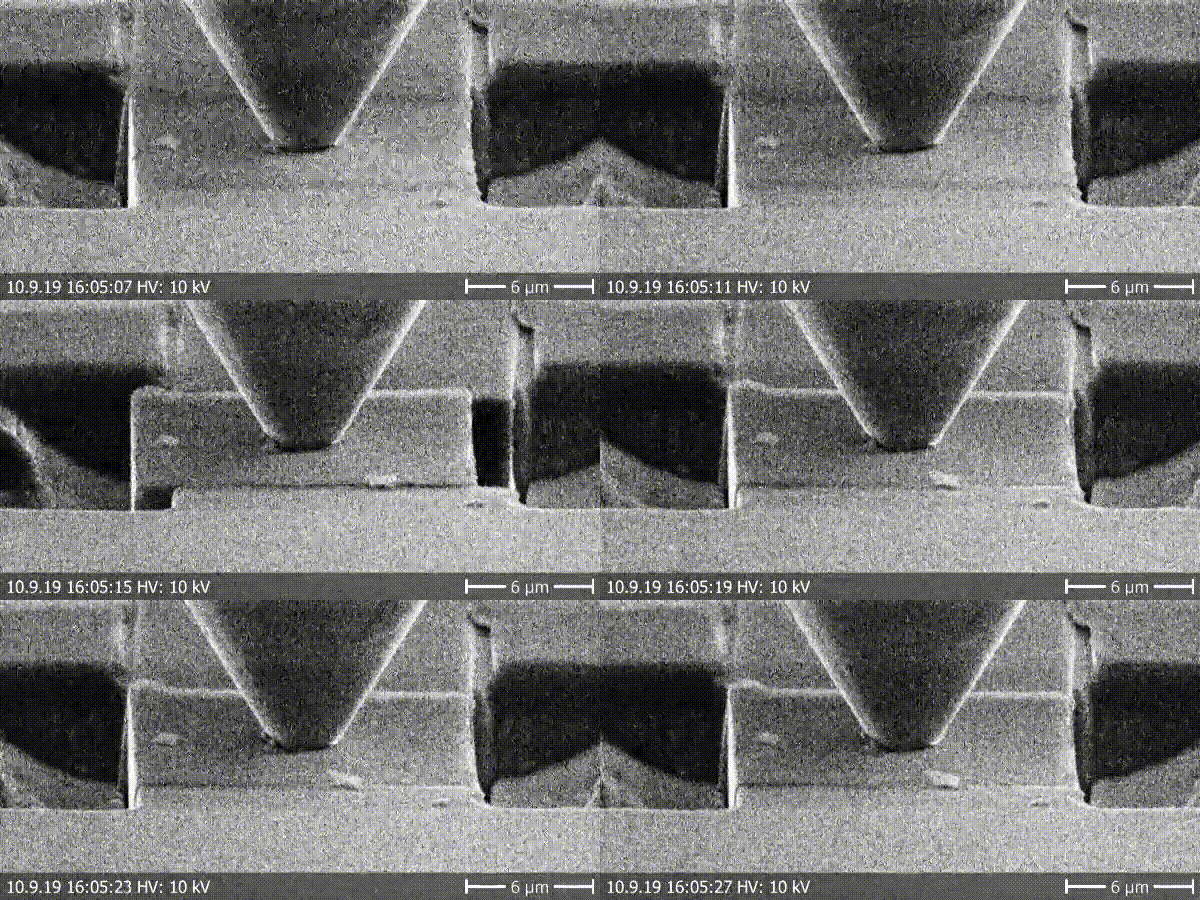
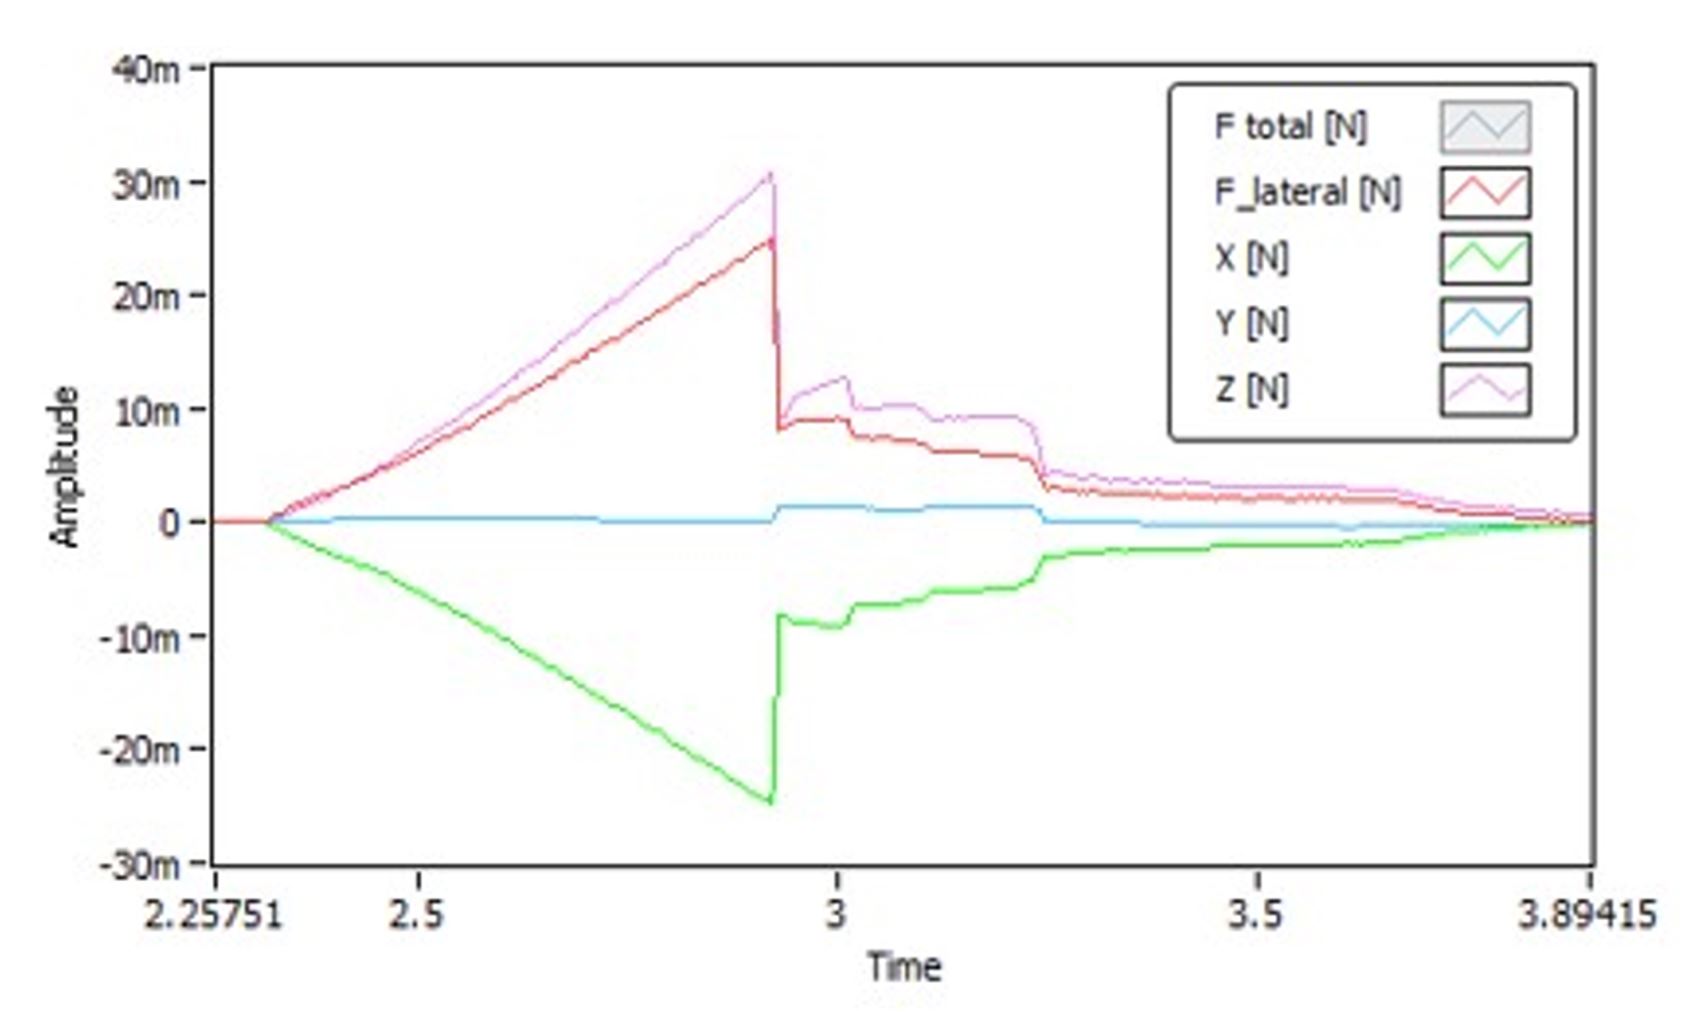
Example of a fibre pull-out test where the indenter is placed in the FIB machined hole, a fixed load applied and then lateral force increased until the fibre debonds. Measured lateral force signal allows calculation of a failure stress of 130 MPa (Courtesy of Dept of Nuclear Engineering, University of California, Berkeley, USA)
Cyclic lateral oscillation tests can also be performed to understand the friction between the fibre and its interface. In order to better grip the fibre, a custom indenter was produced which could hold the fibre at two points and thus prevent lifting during the cyclic tests.

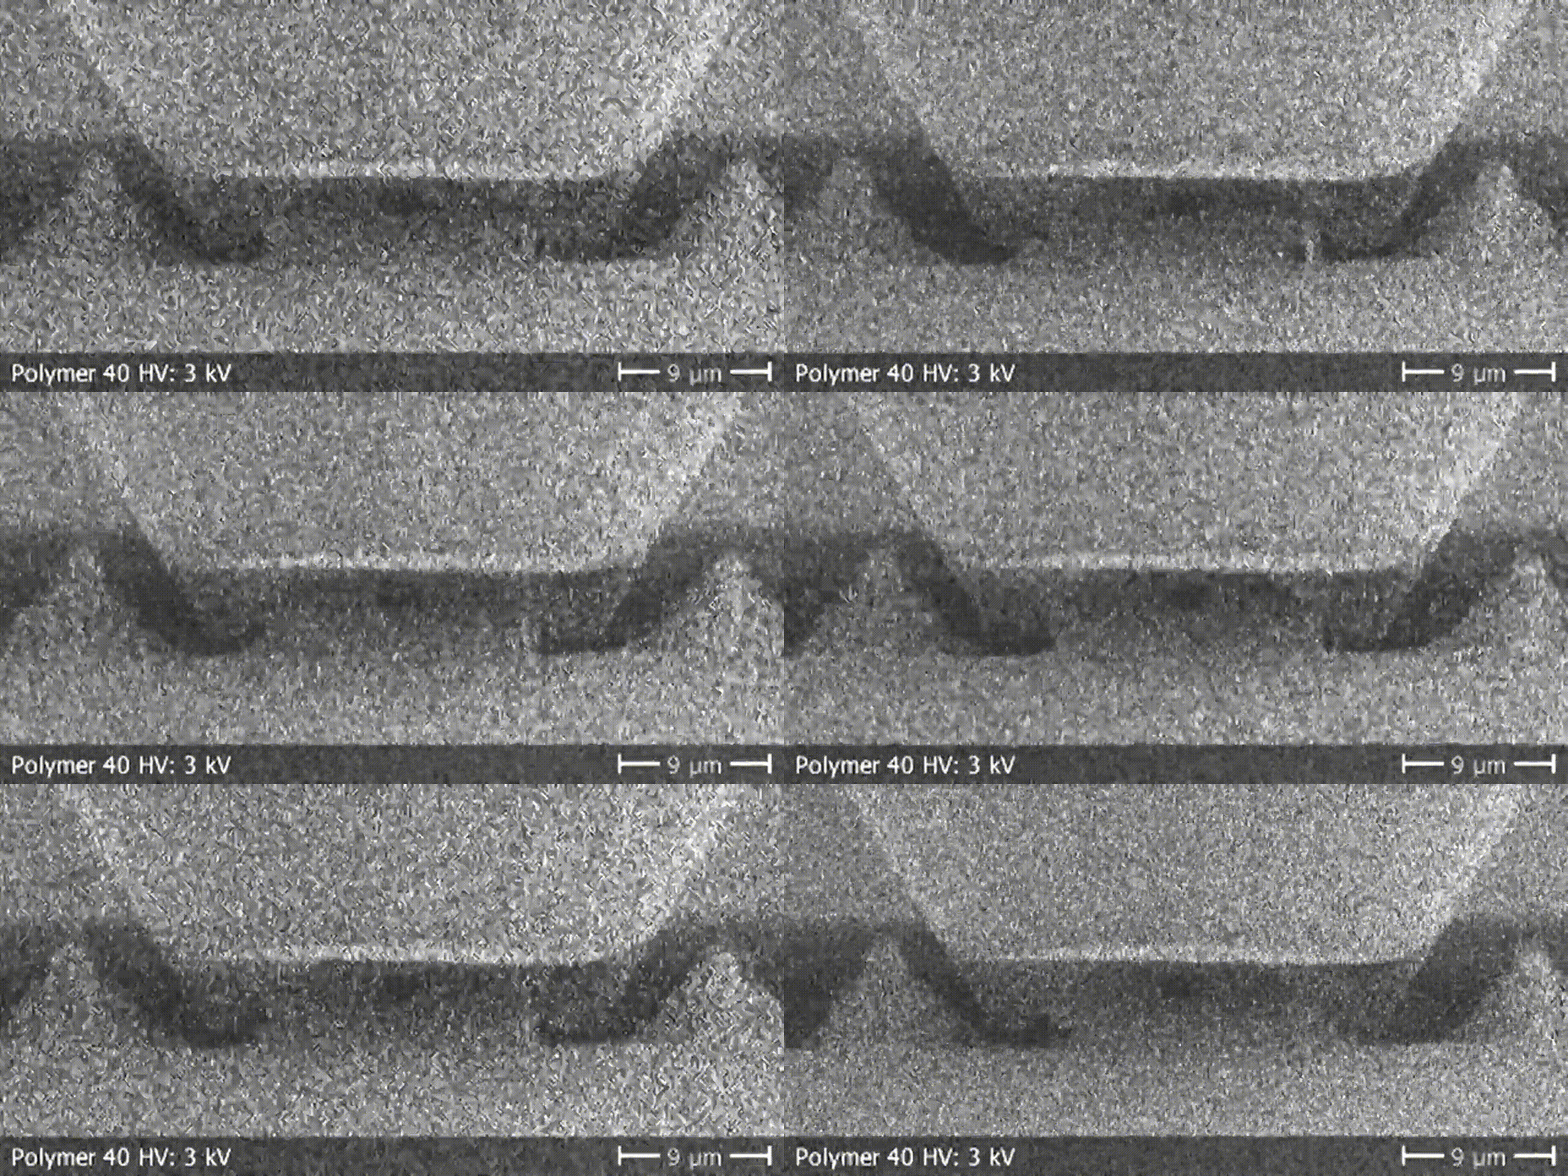
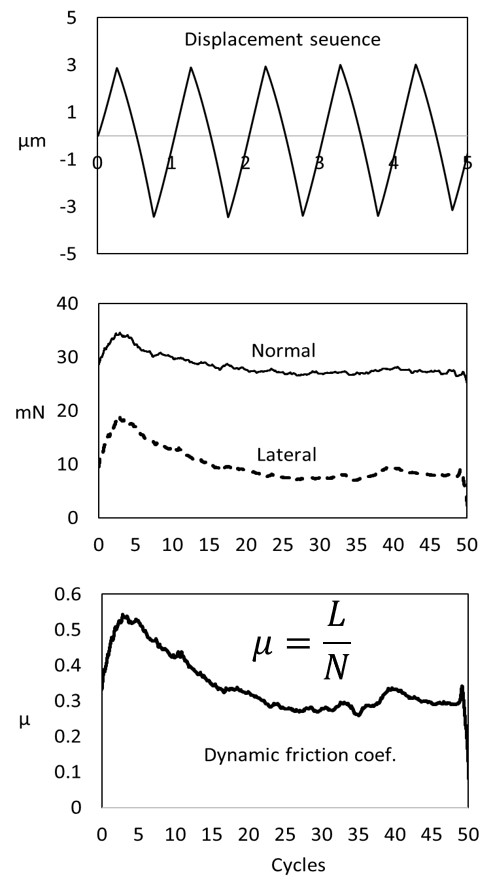
Examples of cyclic lateral oscillation tests to understand the dynamic friction between a fibre and its interface. Two test frequencies are shown: 1 Hz (upper) and 5 Hz (lower) with both giving a steady state friction coefficient of ̴ 0.3 (Courtesy of Dept of Nuclear Engineering, University of California, Berkeley, USA)
Selected References
- L. Major, R. Major, M. Kot, J. M. Lackner, B. Major, Ex situ and in situ nanoscale wear mechanisms characterization of Zr/ZrxN tribological coatings, Wear 404 (2018) 82–91. https://doi.org/10.1016/j.wear.2018.03.011.
- M. Isard, I. Lahouij, P. Montmitonnet, J. M. Lanot, Third-body formation by selective transfer in a NiCr/AgPd electrical contact. Consequences on wear and remediation by a barrel tumble finishing, Wear 426 (2019) 1056–1064. https://doi.org/10.1016/j.wear.2018.11.022.
- H. H. Ding, V. Fridrici, G. Guillonneau, S. Sao-Joao, J. Geringer, J. Fontaine, P. Kapsa, Investigation on mechanical properties of tribofilm formed on Ti–6Al–4V surface sliding against a DLC coating by nano-indentation and micro-pillar compression techniques, Wear 432 (2019) 202954. https://doi.org/10.1016/j.wear.2019.202954.
- L. Major, J. Lackner, M. Kot, B. Majora, Nanostructural aspects of the wear process of multilayer tribological coatings, Tribology International 151 (2020) 106411. https://doi.org/10.1016/j.
triboint.2020.106411


